How to operate the editor

On this page, we will show you how to operate the "Design Editor" that allows you to freely design and create original license plates and dog tags on the PL8 HERO website.
table of contents
Add to cart and place an order
Editor's basic screen
[Free design] Series On the product page of, be sure to look like the image below "Design freely with an editor" There is a button called. Tap there to start designing!

Tap the button to launch the following editor. This screen is the basic operation screen, so please check before starting the design.

Upload an image
- Tap the "Upload" button at the bottom of the screen to display the screen below.

- If you tap "Upload image", various upload methods will be displayed.Please accept the image below for details.

- When you add an image, the uploaded image will be inserted in the editor screen.You can move, rotate, and scale the image by referring to the image below.

Add text
- Tap the "Text" button at the bottom of the screen to display the screen below.As you can see in the image, you can enter the text as you like, choose the font and customize it to your favorite color.

- Tap "Add Text" to insert a text part on the editor.You can move, rotate, zoom in and out, and re-edit using the operation method shown in the image below.

- Also, with the "TEXT ART" effect, you can transform it into various shapes as shown in the screen below, and you can also add lines around the characters.

- With the text tools described above, you can easily create such designs.

Save the design
- You can easily save your design by tapping the "Design" button at the bottom of the screen.You can specify the file name, save it, and recall it later, as shown in the image below.

- Be careful when saving. No special registration is required to save the design, but the storage system uses information called cookies managed by your browser to determine it. Therefore, if it has been a long time since the design was created, the browser cache is cleared, or the cookie is not saved, the design may not be saved properly. Please check your browser settings before saving your design.A warning with the same content will always be displayed, so tap the OK button to complete the save.

- The saved design can be easily recalled from the "Design" button when the page is reloaded later.

Check with 3D preview or AR
- By tapping the "3D Preview" button at the top left of the screen, you can check the 3D finished image as shown in the image below.

- You can check the 3D preview by swiping the screen with your finger on a smartphone or clicking and dragging on a PC to rotate the preview.

- If you press the AR button, you can check the size feeling etc. in the preview using augmented reality. However, please note that it may take several minutes for the image to be loaded normally, depending on the image blur and line conditions.

Add to cart and place an order
- When the design is completed, tap the "Add to cart" button at the top right of the screen to add the designed data to the cart.
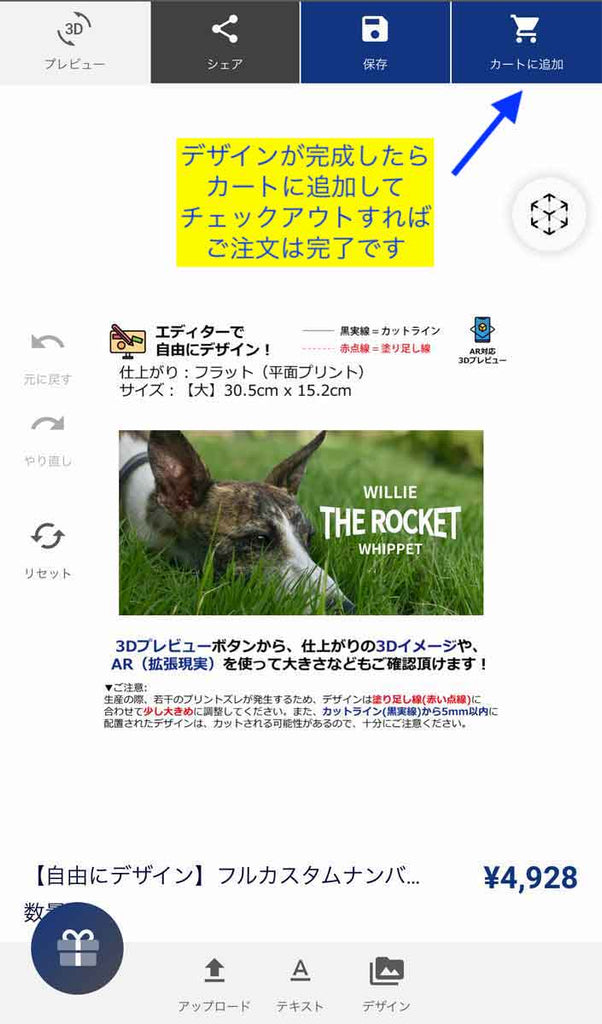
- If it is added to the cart and there are other items you have purchased, you can continue to add other items.Unless otherwise specified, proceed to "Checkout" to complete your order.
- After confirming your order and payment, production will start in about 3 business days.Yet, [Free design] Series Then, there is no calibration confirmation. Customers will be producing the product as it is designed on this editor, so please check in advance using 3D preview etc. so that there are no spelling mistakes or image placement defects. By the way, during this explanation, the actual design created by the editor will look like this.
